Thursday 24 October 2013

Pumpkin and white chocolate cupcakes with cinnamon cream cheese icing

Pumpkin and white chocolate cupcakes with cinnamon cream cheese icing - Steph's Kitchen


With Halloween fast approaching the amount of pumpkin recipes has grown three fold in my news and blog feeds. As Halloween is not that big here in Australia I've never really had too much to do with baking with pumpkin, with the only recipe I really know being Pumpkin fritters (a South African sweet pikelet that you toss in cinnamon and sugar).

All this pumpkin cheer made me want to try some pumpkin baking for myself. Browsing through my recipe book I decided to adapt an old banana bread recipe to create these pumpkin and white chocolate cupcakes with a cinnamon cream cheese icing.


Pumpkin and white chocolate cupcakes - Steph's Kitchen


Pumpkin and white chocolate cupcakes

Makes 16 large cupcakes or 32 mini cupcakes

300g of cooked pumpkin, mashed
75g softened butter or margarine
3/4 cup brown sugar
2 eggs
1/2 tsp bi-carb
Pinch of salt
1 tsp mixed spice
1/2 tsp cinnamon
100g white chocolate
1/4 tsp red food colouring
1/2 tsp yellow food colouring

Cinnamon cream cheese icing


250g cream cheese
1/3 cup icing sugar
1/2 tsp cinnamon
1/2 tsp vanilla extract

Before you forget - preheat your fan forced oven to 180 C or 390 F.

In a mix master or with electric beaters cream the butter and brown sugar. Add the eggs and beat until the mixture is smooth and thick. Next add the pumpkin, spices and food colouring, mixing through until the pumpkin and food colouring is evenly through the mixture. You might be wondering why I add the food colouring; it's to enhance the orange colour of the pumpkin. You could really add any colouring you like, such as green to make the mixture bright green or black for something a bit more spooky.

Gradually add the flour, followed by the salt and bi-carb. The mixture might look a little thick but you still need to add the melted chocolate. Melt the white chocolate and add to the mixture while its still hot. You can melt chocolate in the microwave but I think it's always better doing it the old fashioned way in a bowl over a pot of simmering water. If you're not sure how to do it, here's is a great little video on how to melt chocolate on the stove. Fold the white chocolate through your mixture until it's mixed completely through.

Set up your cupcake cases in a cupcake tray and fill them half way with the mixture. I find the best way to fill cupcake cases is using two spoons (a soup spoon and a dessert spoon). Take a spoon of mixture on your soup spoon and push it into the case using the dessert spoon. My Mum taught me this clever treat so that you don't make a mess all over the sides of the cases trying to get the mixture in. If you are using mini cupcake cases use the same technique but with teaspoons.

Bake in the oven for 20mins (10mins for the mini cupcakes). Once cooked through turn the cupcakes out onto a cooling rack and get started on the icing.

Blend the cream cheese in a food processor until smooth. Next add the icing sugar, vanilla extract and cinnamon. Blend again until all the ingredients are well combined.

Once the cupcakes are cool spread the icing on top, sprinkling with a little vanilla sugar or icing sugar.


Enjoy!

Steph xo


Saturday 12 October 2013

Lime Coconut Cake


Lime and coconut cake - Steph's Kitchen

Recently someone was very kind at work to bring in limes from their tree at home. There were bags of them left in the kitchen, so I grabbed a number of them and then pondered about what I could create. I used the limes in a few things, including a lime chilli marinade for prawns (amazing by the way!), but I thought the last few deserved to be made into something sweet and delicious!

I love lemon cake so I thought a lime version would be great - and coconut goes great with lime! Once this idea entered into my mind I just had to create this lime coconut cake; soft and fluffy with a lime and sweet coconut flavour. I then took my whipped butter icing and added in lime zest and juice to make a lovely citrus icing, which really finished it off amazingly.

A slice of lime coconut cake - Steph's Kitchen
 

Lime coconut cake with lime butter icing


125g softened butter or margarine
2/3 cup sugar
2 eggs
1 tsp vanilla essence
1/4 cup lime juice
1 1/4 cups SR flour
3/4 cup desiccated coconut
1/2 cup milk


Lime butter icing

85g softened butter or margarine
200g icing sugar
1/2 Tbsp lime zest
1/2 Tbsp lime juice
Green food dye
Sprinkle of coconut (for on top)

Before you forget, pre-heat your oven: 180 C (fan forced), 200 C (electric), 400 F.

With electric beaters or a mix master, cream the butter and sugar until light and fluffy. Add both eggs and the vanilla, beating again until the mixture is thick and looks like cake mixture. My Mum has always told me this is the trick to a fluffy cake, and in my experience it always results in a light and fluffy cake every time.

Next add the coconut, then alternate adding the flour and milk bit by bit. I like to make sure that each time I add the flour or milk that I beat up the mixture again until it's nice and fluffy. Finally fold through the lime juice by hand; keep folding the mixture until the texture is smooth and creamy.

Add the mixture to a greased cake tin and bake it in the oven for 25-30 mins. It is best if you test the cake with a skewer at the 25 min mark, taking it cake out of the oven if the skewer comes out clean. Depending on your oven it could take a little bit longer. Once cooked allow the cake to cool while you start on the icing.

In a small bowl whip up your butter or margarine until fluffy. I usually use margarine and just a wooden spoon, but you can also use electric beaters. Add the icing sugar bit by bit (if you are using beaters, start on a slow speed until the icing sugar is mixed into the butter). Once all the icing sugar has been added, mix through the lime zest and juice, followed by a few drops of green food colouring. You don't have to add the colouring but I really liked the icing having a little bit of green to it. The green colour also reinforces the lime flavour, as green is often a colour associated with lime flavours. A little like if you saw strawberry ice cream that wasn't pink it might not taste as "strawberry" in flavour; just fascinating, isn't it?

Ensure that the cake is cool to touch before spreading the lime butter icing on top, sprinkling a little bit of coconut on top as the final touch.

Now, make a nice big cup of tea (or coffee!) and enjoy a large piece of cake!

Eating lime coconut cake - Steph's Kitchen

Steph xo

Saturday 5 October 2013

Eating with our eyes - good or bad?

Is appearance really what is important?


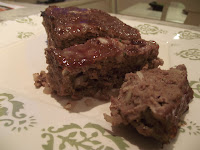
Looking over draft blog posts today I stumbled across my meatloaf recipe that I love to make and I just can't bring myself to post it. You know why? I just feel I cannot get a good picture of it that screams "Eat me - I am delicious!". When I look at my meatloaf, all juicy and glazed with this gorgeous tangy sauce all I see in the photo is brown on a plate because it is just, well ... it's just a lot of cooked meat, isn't it!


Glazed meatloaf - Steph's Kitchen
My glazed meatloaf - which I
promise tastes amazing!
This got me thinking about just how much importance we place on the appearance of food. Just think about it a moment - are you more inclined to make a recipe if the picture looks amazing or if it just looks like normal everyday food slapped on a plate? I think most of us will admit that we fall in with the first answer; we eat with our eyes. If a dish looks so delicious that we just want to devour it now then we are more likely to dash out and get the ingredients.

Think about chocolate recipes, which I find I am the worst for doing this with. Most chocolate recipes you find feature this gorgeous decedent chocolate masterpiece. Imagine if that chocolate recipe simply looked like brown on the plate. Would you be less likely to make it, even if it had the same ingredients and method? Most likely yes.

This also happens when we dine out. We expect the food to look not only appealing but perfect when it is placed in front of us. When I did hospitality this was why food plating and presentation had so much importance; you can't expect a customer to pay for something that doesn't look good. There are expectations, almost unspoken, about it needing to look perfect.

I wonder if this perfection sometimes gets us down when in the kitchen. Stopping and thinking about it, yes - I think I too get fixated on dinner looking amazing on the plate. Sometimes I get upset when it doesn't look "good", even though it might taste amazing. I have even at times almost been in tears because I think it looks unappealing by the standards I have placed upon myself. Poor Mr Steph tries to reassure me that it looks amazing but I just get so caught up in the fact it "looks horrible" (even when it doesn't at all!) that I just get upset at myself. Shouldn't the fact that we have created a delicious dish be what is important? Yes. It should be.

Steph from Steph's KitchenSo, I put out a challenge to you all (and to myself) - forget perfection and remember that you are still putting up something great, no matter how much it doesn't look like what the cook book shows! Be proud of what you have created, because you should be. And I think this also goes for ourselves as well - Who cares what we think we should look like! We are who we are, and in our own ways beautiful.

Steph xo